How to setup tubeless tyres
Tubeless tyre setups are used widely now, particularly on MTB’s. When a rider gets a puncture, the air pressure in the tyre forces a small amount of sealant out through the hole. When it meets the air it solidifies and seals the hole.
Benefits of Tubeless
There are some tangible benefits by converting to tubeless. Let’s discuss them
Traction/Comfort/Lower Pressures
A tubeless tyre can be run at a much lower pressure than a typical tyre with an innertube. This can improve traction without the greater risk of getting pinch flats. Running lower pressures can also increase the comfort while riding your bike because it’s much better at absorbing bumps.
Self Healing
The biggest advantage of converting to tubeless is the tyres have the ability to self-heal when you get a puncture. As long as the hole isn’t a cut or too big, you can continue riding. The sealant will block the hole. You can simply add more air if you want if the tyre goes too soft.
Easy Repairs
If you are unlucky and have a puncture and the sealant isn’t able to fix it. Instead of having to change a tube, you can use a tubeless plug. This is a small device with small strips of rubber which you push into the hole in the tyre to reduce the hole size and help it seal. After plugging, you pump it back up, and it should seal. If the hole is too big and you can’t plug it, you can still throw a tube in.
Lighter
The average weight of an inner tube is roughly 120-150gg, and the sealant is roughly around 30-60g. So tubeless will save you a bit of weight but it’s not massive.
Less Rolling Resistance
The other big advantage of tubeless is that you get much less rolling resistance. Innertubes create friction when fitted inside which adds to it’s rolling resistance. Remove the tube and you eliminate it thus the tyre will roll better and ultimately make you a bit faster!
Disadvantages of Tubeless
At first glance, a tubeless setup may seem like the ultimate wheel setup and the best idea ever but there are a few nuances with tubeless that put people off. Here they are.
Cost
Tubeless tyres are not cheap. Throw in valves, sealant and tape and a conversion won’t leave you much change out of £100-£130. Even more if you pay a bike shop to do it for you. Some of this cost can be mitigated if your rims are tubeless-ready and you do it yourself. However, if they are not, you’ll need to invest in a conversion kit
Setup
Traditional tyre + tube setups are quick, easy, clean and been around for decades. It’s fast and simple. In contrast, tubeless setup is bit more of a faff requiring a boost pump or compressor to seat the tyre and even then a complete seal is not guaranteed. Additionally, tubeless sealant needs to be checked and replaced every 3-6 months because it dries out.
Messy
Tubeless can get messy. When you puncture and the hole can’t be sealed, it can spray everywhere. If you need to change your tyres or remove them to check your sealant, again it can be a messy job, for some, too messy to bother.
How to fit a tubeless tyre
You’ve weighed up the Pro’s and Con’s and decided to go for it. Here is how to setup a tubeless tyre.
You will need the following: Tubeless-Ready tyres, Tubeless Valves, Tubeless Rim Tape (wide enough to fit edge to edge), Sealant, Tyre Levers, a Boost Pump or Compressor
Wheel Preparation
- Remove all old rim tape and sealant and clean rim.
- Make sure the rim is clean and dry before applying tape.
- Line the rim tape up from the opposite side of the valve.
- Start by unwinding a small amount of the tape and pressing it down using your thumb or finger to hold pressure down.
- Continue to hold while you pull back on the tape and stick down tight once you have a few cm on the tape will stick and holding is no longer needed.
- Continue the entire way around the rim
- Overlap the tape by roughly 10 – 15cm, cut the remainder off
- Go around the rim with your thumb to make sure there are no air pockets. The tape should fitted edge to edge.
- Using a small pin or braddle type tool, locate the valve hole and cleanly pierce the tape ready for the valve
Valve Fitting
- Take your tubeless valve and remove the lock ring and o ring
- Choose the right rubber fitment for your rim tape and insert the valve into rim
- Refit the o-ring and lock ring making sure you lock the valve in (don’t go to tight or could damage the rubber)
Fit Tyre
- Re-fit your tyre being careful not to damage the tape with your levers
- Inflate tyre to seat it. The tyre will ‘pop’. This is normal. Spin the wheel to make sure it is seated equally all the way round
- Release Air and remove valve core using the spare valve cap
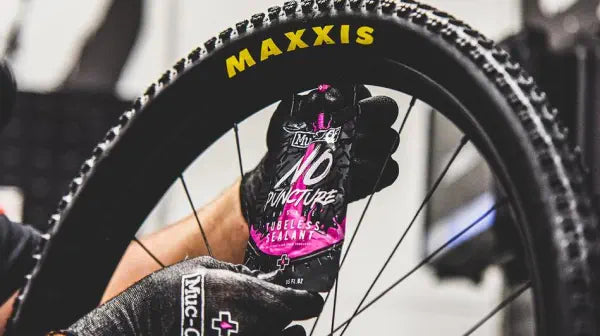
Add Sealant
- Grab your sealant and give it a shake
- Remove your valve core. Fit your sealant puch or bottle onto the valve
- While holding the sealant, spin the wheel downward to about 7 o’ clock so that the pouch is now upside down and the sealant has somewhere to run in the tyre
- Squeeze the sealant to force it into the tyre
- Spin wheel back up right and remove the sealant
- Reinsert valve core and inflate tyre to your pressure
- Spin the wheel to help seal the rest of the tyre’s bead
For some videos that support and explain the various tasks outlined above, click here
